If you’re using AirVoice Wireless and facing issues with mobile data or sending MMS on your Android device, setting up the correct AirVoice Wireless APN settings for Android is essential. APN (Access Point Name) settings act as a bridge between your smartphone and the mobile network, enabling internet access and multimedia messaging services (MMS).
In this comprehensive guide, we will walk you through the step-by-step process to configure AirVoice Wireless APN settings for Android devices, troubleshoot common issues, and ensure that you can fully use your phone’s data and messaging capabilities.
Why You Need AirVoice Wireless APN Settings for Android
APN settings are crucial for your phone’s connectivity to mobile data and multimedia messaging services. Without the proper APN settings, your phone may not connect to the internet, and you might face issues with sending or receiving MMS. If you’re an AirVoice Wireless customer, you need to ensure that your Android device is configured with the correct AirVoice Wireless APN settings for Android to enjoy seamless internet and MMS access.
Common issues caused by incorrect or missing APN settings include:
- Mobile data not working
- Unable to send or receive MMS
- Poor or inconsistent internet connectivity
By setting up the correct AirVoice Wireless APN settings for Android, you can avoid these problems and ensure that your mobile experience is uninterrupted.
Step-by-Step Guide to Configuring AirVoice Wireless APN Settings for Android

Follow these steps to manually configure the AirVoice Wireless APN settings for Android:
1. Access APN Settings
- Open your Android device’s Settings app.
- Navigate to Network & Internet or Connections (depending on your Android version and manufacturer).
- Tap on Mobile Networks or Cellular Networks.
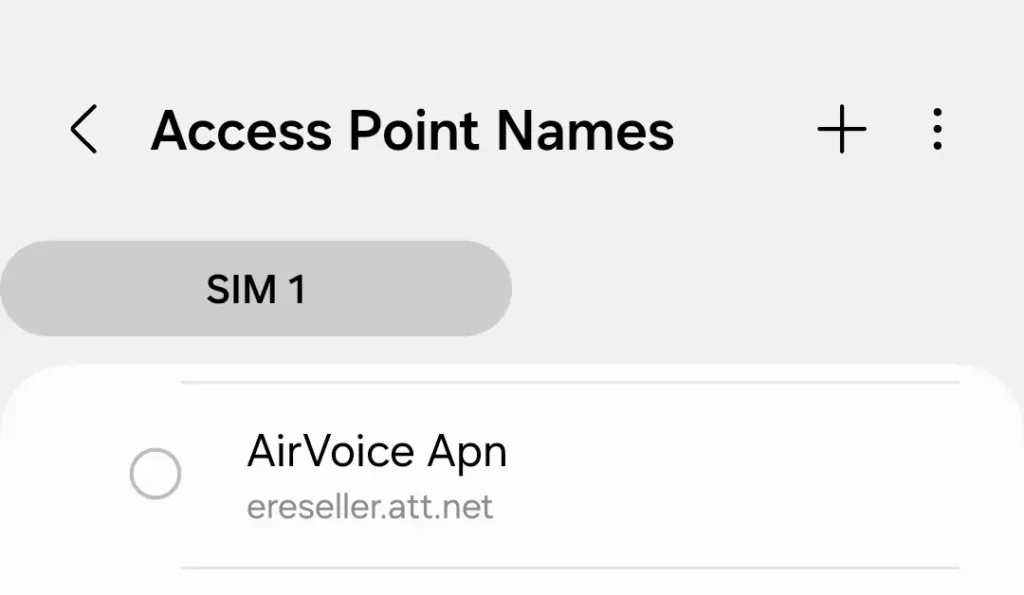
- Select Access Point Names (APN).
- If there’s no existing AirVoice Wireless APN, tap Add or the “+” icon to create a new APN.
2. Enter AirVoice Wireless APN Settings for Android
Enter the following details into the APN fields:
- Name: AirVoice (or any name you prefer)
- APN: att.mvno
- Proxy: Not set
- Port: Not set
- Username: Not set
- Password: Not set
- Server: Not set
- MMSC: http://mmsc.cingular.com
- MMS Proxy: proxy.mvno.airvoicewireless.com
- MMS Port: 80
- MCC: 310
- MNC: 410
- Authentication Type: Not set
- APN Type: default,supl,mms
- APN Protocol: IPv4/IPv6
- Bearer: Unspecified
- MVNO Type: None
3. Save and Activate the AirVoice Wireless APN Settings for Android
Once you’ve entered all the necessary fields, tap Save to store the new settings. Next, select the AirVoice Wireless APN to activate it. This step ensures that your device uses the correct APN settings to connect to the internet and send MMS.
4. Restart Your Device
After saving and selecting the new APN settings, restart your Android device. This step ensures that the settings take effect properly.
How to Set Up AirVoice Wireless SMS Settings for Android
In addition to APN settings, you may also need to check your SMS (text messaging) settings to ensure smooth message sending and receiving. This involves configuring the SMSC (Short Message Service Center) number.
Steps to Set SMSC (Message Center Number) for AirVoice Wireless
- Open the Messages app on your Android device.
- Tap on the three-dot menu and go to Settings.
- Locate SMSC settings or Message Center under Advanced settings.
- Enter the following Message Center Number (SMSC): +13123149810.
- Save the settings and exit.
Troubleshooting AirVoice Wireless APN and SMS Issues
Even after configuring the AirVoice Wireless APN settings for Android, you may still encounter a few issues. Here’s how to troubleshoot common problems:
1. Mobile Data Still Not Working
- Ensure that all fields in the AirVoice Wireless APN settings for Android are filled in correctly.
- Check that mobile data is enabled under Settings > Network & Internet > Mobile Data.
- Try switching between 4G and 3G networks in your settings if your mobile data isn’t connecting properly.
2. Unable to Send or Receive MMS
- Confirm that the MMS Proxy and MMS Port fields in the APN settings are entered correctly.
- Make sure that mobile data is turned on—MMS requires mobile data to function.
- Restart your phone and attempt to send the MMS again.
3. SMS Not Sending
- Verify that the SMSC number is entered correctly as +13123149810.
- Reset your network settings by going to Settings > System > Reset > Reset Network Settings if SMS isn’t working.
AirVoice Wireless Network Coverage
AirVoice Wireless operates on the AT&T network, providing extensive coverage throughout the U.S. However, coverage may vary depending on your location. If you continue to experience issues even after configuring the APN settings, check AirVoice Wireless’s coverage map or contact their customer support for assistance.
How to Verify Your APN Settings Are Working
Once you’ve configured the AirVoice Wireless APN settings for Android, here are a few ways to check if they’re working:
- Test Mobile Data: Open a browser or app that requires internet access to ensure your mobile data connection is active.
- Send an MMS: Send a picture message to yourself or a friend to confirm that MMS is functioning.
- Check Network Speeds: Use apps like Speedtest to check your mobile data speeds and ensure they align with AirVoice Wireless’s expected performance.
Frequently Asked Questions
1. Why is my mobile data not working on AirVoice Wireless?
Mobile data may not work if your APN settings are incorrect. Verify that all fields are entered properly as outlined above.
2. How do I fix MMS issues on AirVoice Wireless?
Double-check the MMS Proxy and MMS Port fields in the APN settings. Ensure that mobile data is enabled, as MMS requires an active data connection.
3. Can I reset my APN settings?
Yes, you can reset your APN settings by going to Settings > Mobile Networks > Access Point Names and selecting Reset to default. You may need to re-enter the AirVoice Wireless APN settings for Android afterward.
Conclusion
Configuring the correct AirVoice Wireless APN settings for Android is crucial to ensure smooth mobile data and MMS functionality. With the settings outlined in this guide, your Android device should be fully equipped to connect to the internet and handle multimedia messages on the AirVoice Wireless network.
If you encounter any issues, don’t hesitate to reach out to AirVoice Wireless customer support. With the right configuration, you’ll be able to enjoy all the services AirVoice Wireless has to offer on your Android device.
With these detailed instructions on setting up AirVoice Wireless APN settings for Android, you’ll have no problem staying connected!


